I may earn commission if you use my affiliate links to purchase products: More details.
If you’re wondering how to create a business website and start earning money, then you’re in the right place. In this article, I’ll show you how you can easily set up and run a business website within 20 minutes without requiring any developer skills.
These days, setting up a website is as easy as opening a social media account. With the help of a CMS (content management system), ready-made templates, and page builders, you can create and design your website as per your taste.
I use the popular open-source platform called WordPress.org to build websites for myself and my clients; WordPress has a market share of 43% among all websites.
Note: This tutorial is about the Open-source WordPress.org platform, which is used to build self-hosted websites; not be confused with WordPress.com
Without any further ado, let’s get started:
How to Start a Business Website in India
Requirements to start a website
You just need two things;
- Domain Name
- Web Hosting (server)
Registering the Domain Name
Registering the domain name is quite easy; find a domain registrar, search for the availability of your desired business name, and buy it. It usually costs you around 700-800 rupees per year.
Generally, web hosting companies let you register a domain name for a very low rate or sometimes even for free with their hosting plan. However, it is normally recommended to keep your domain and hosting separate. So, here are some of the domain registrar sites to buy your domain. I often use NameCheap and Google Domains.
How To Register a Domain Name:
- Go to NameCheap.com
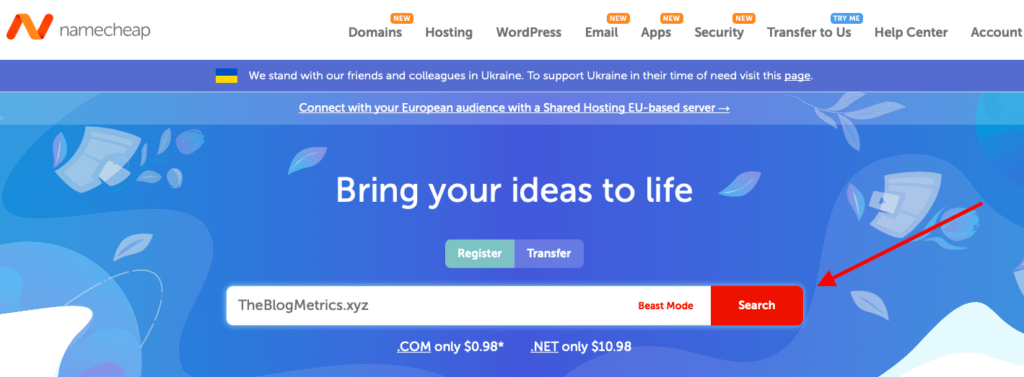
2. Search for your desired domain name. In this example, I’ve picked TheBlogMetrics.xyz (note: .xyz extension domains are not suitable for professional use, and it’s used to create demo sites. I recommend going with Top-level domain extensions like .com, .net, or .in)
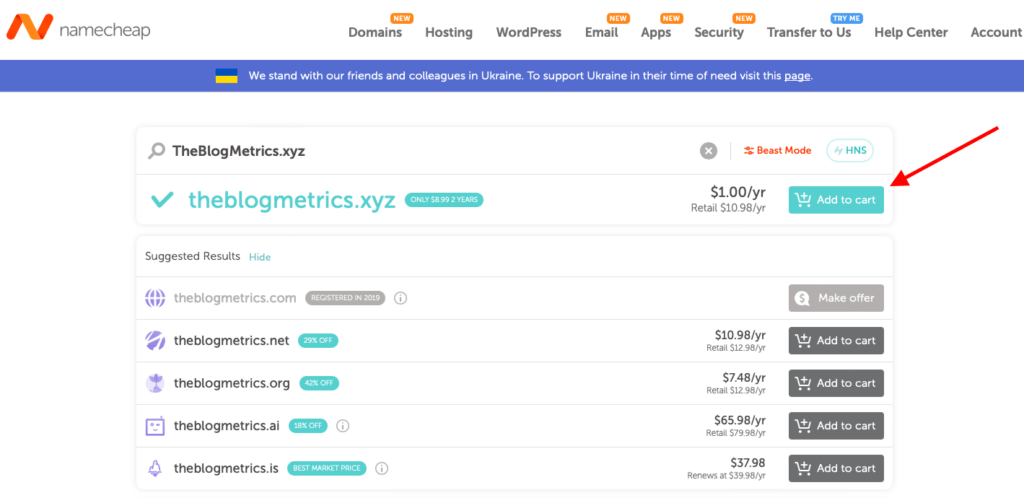
3. Click on Add to cart
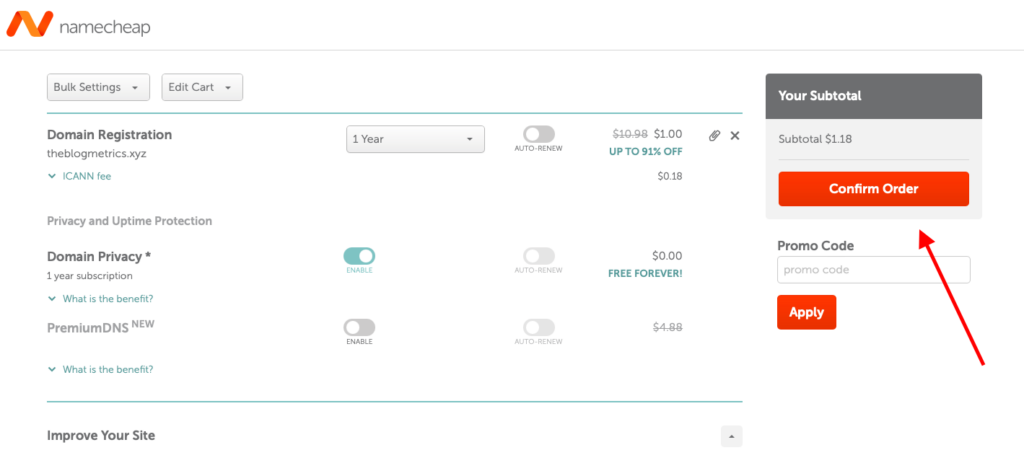
4. Then click Confirm the order and make a payment using a credit card, debit card, or PayPal. Also, sign up for an account using your email.
And that’s it! Confirm your account and that your domain name is ready.
Now, let’s keep the registered NameCheap domain name aside, and let’s learn how to buy web hosting (server).
Web Hosting
Once you have registered the domain name, it’s time to host it on the internet, where you can upload your website content for your visitors to access; buying a web hosting plan is basically like renting a space on the internet.
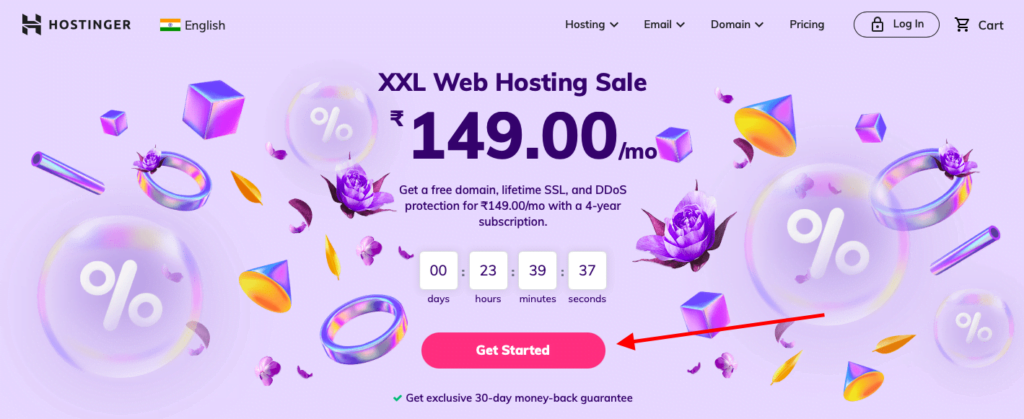
There are many managed web hosting companies like HostGator, BlueHost, etc, which are beginner-friendly. But in this example, I’ll be using Hostinger; Hostinger offers the LiteSpeed web server for all its shared hosting plans, which is faster than other web servers.
The process is similar if you choose any other hosting company.
How to buy a web hosting plan:
- Go to the homepage of Hostinger.in and click Get Started
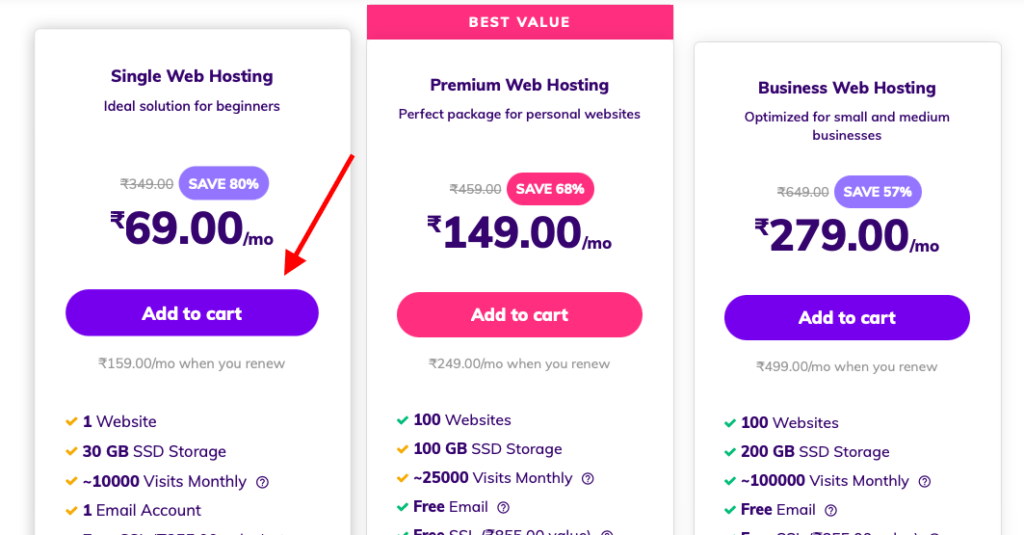
2. Now, you can choose the plan you want. In this example, I’m selecting the basic plan, but you can pick the 2nd plan, which lets you create up to 100 Websites.
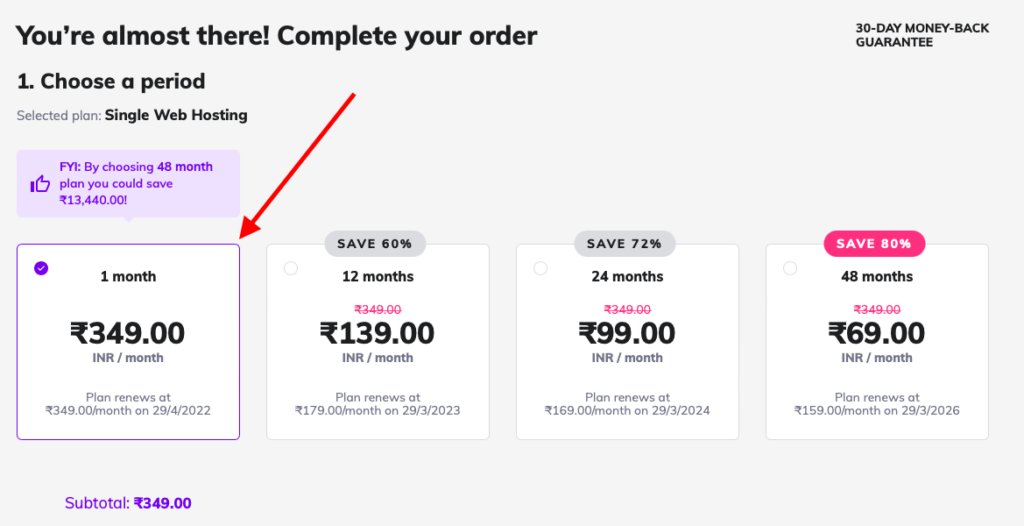
3. Now. If you choose a larger cycle period like 48 months, you can avail yourself of an 80% discount, but I don’t recommend that; I suggest 12 months is good enough to test it out. In this example, I’ll select 1 month only, as I’m creating this website just as a demo.
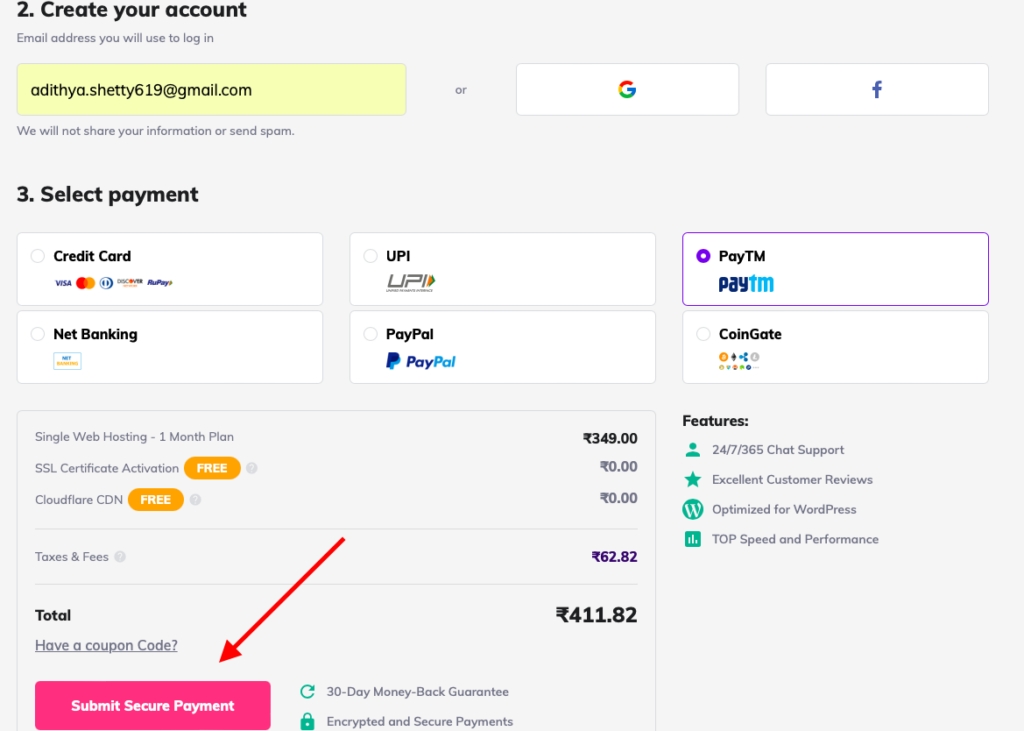
4. Enter an email or sign up using a Google or Facebook account. Here I’m selecting PayTM as my payment method for you. Can choose whichever you like.
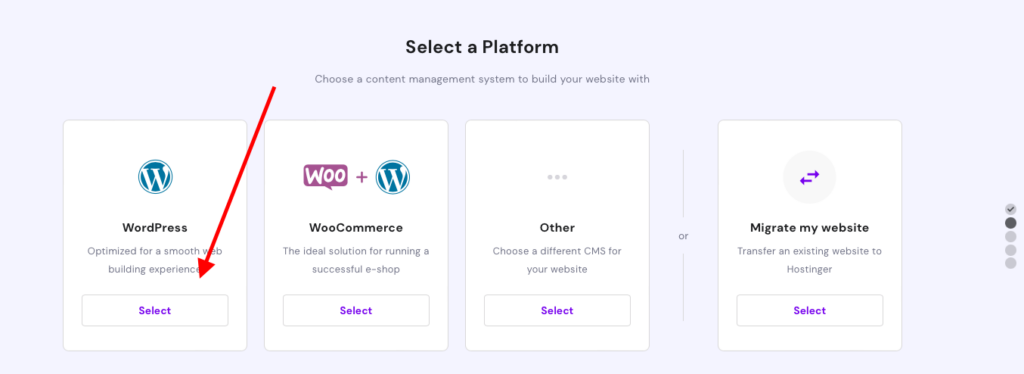
5. Now select the platform for your website. Here I’m selecting just WordPress, but you can choose WooCommerce if you would like to sell your own products on your website (you can also add the eCommerce functionality later with the plugin or a theme).
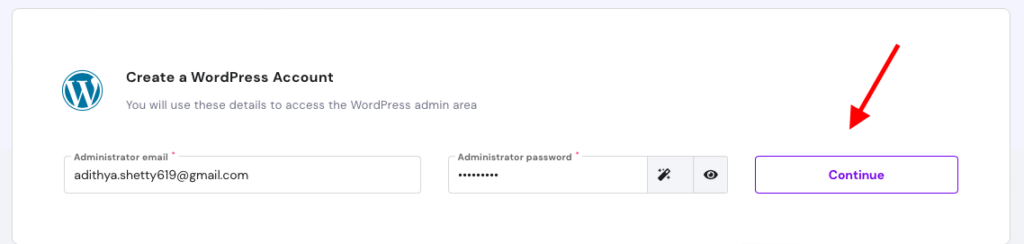
6. Now, create a WordPress account and click Continue.
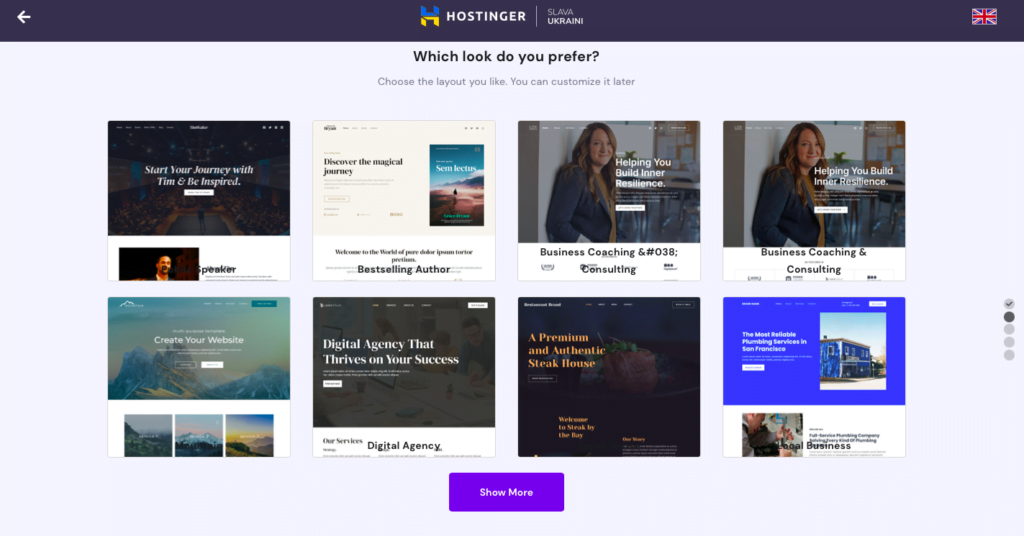
7. Choose a Theme you like. I will select the first one
8. Now it’s time to enter our earlier registered domain name from NameCheap. Or you can create a brand new domain name here as well.
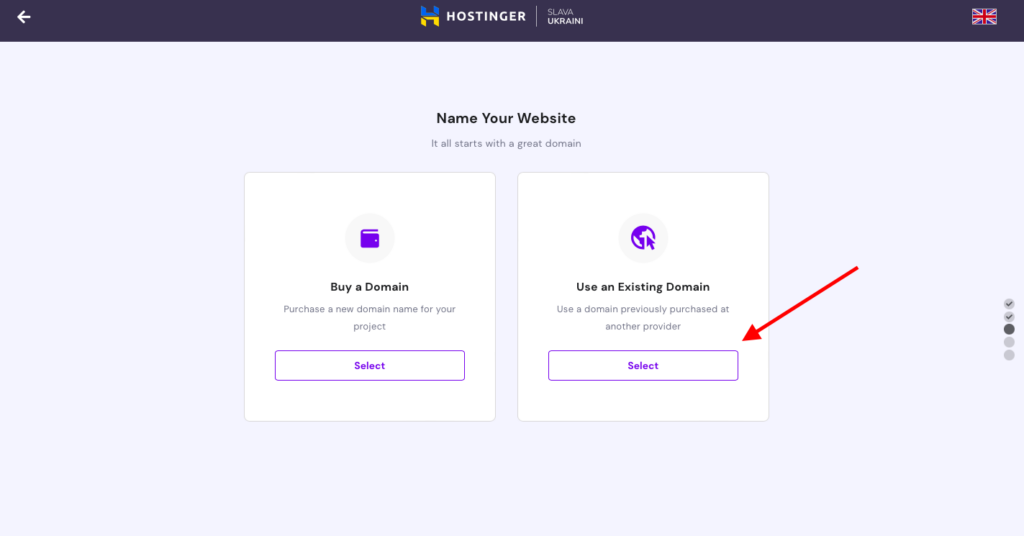
9. Enter the domain name that we have from NameCheap and click Continue
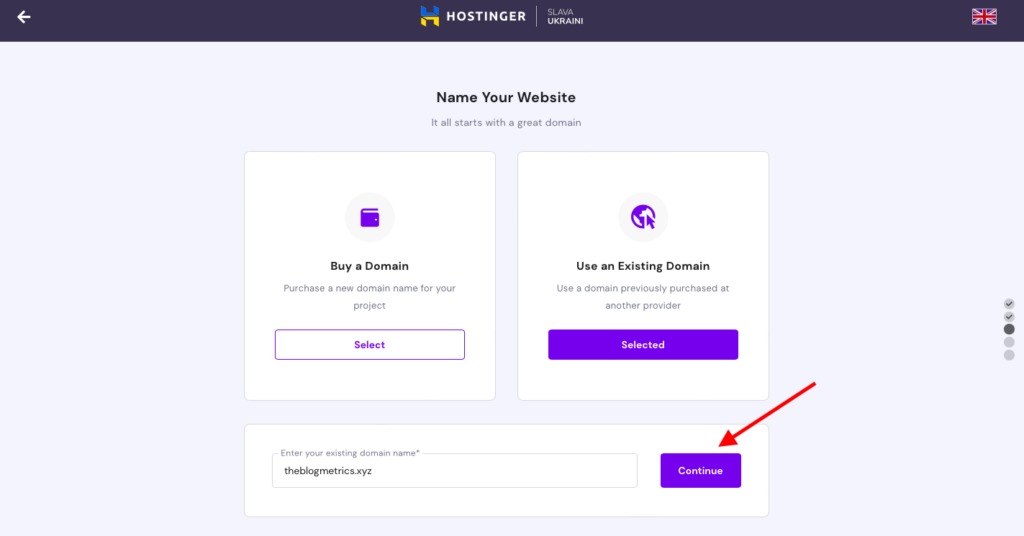
10. It will show you the details of your domain; then click Continue

11. Next, Click On Finish Setup

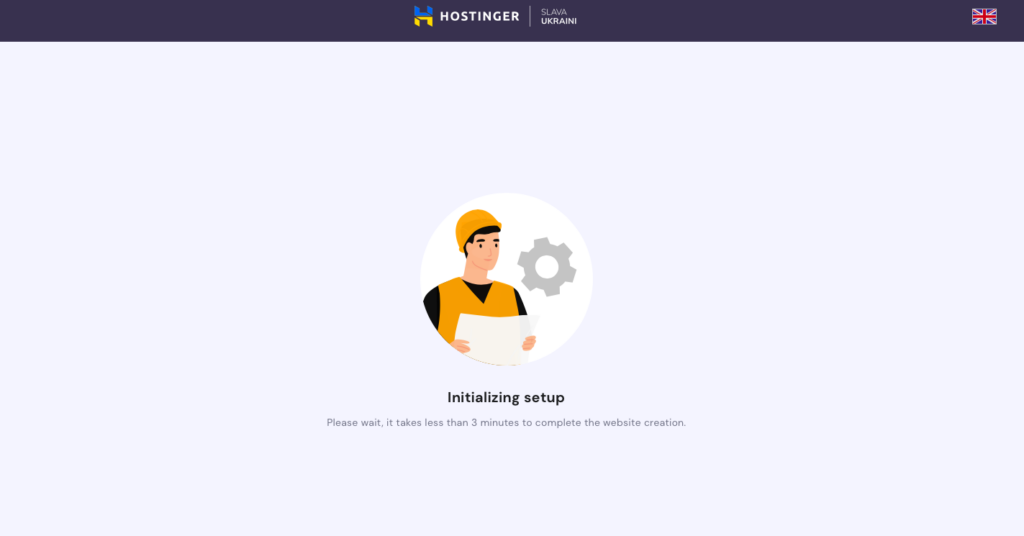
12. Now, it’ll start the installation process
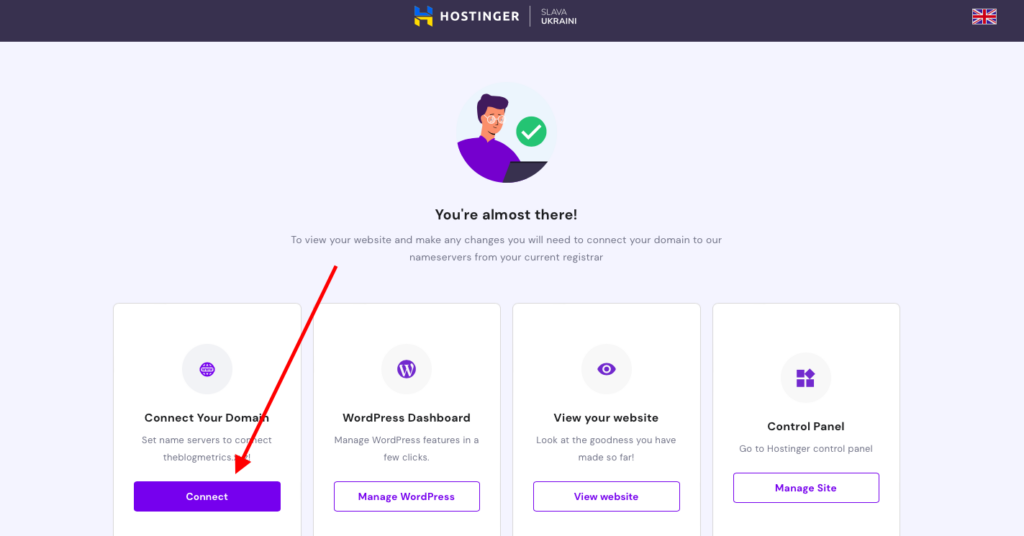
13. Now, you’re almost done.
14.
How to Connect Your Domain Name with Web Hosting
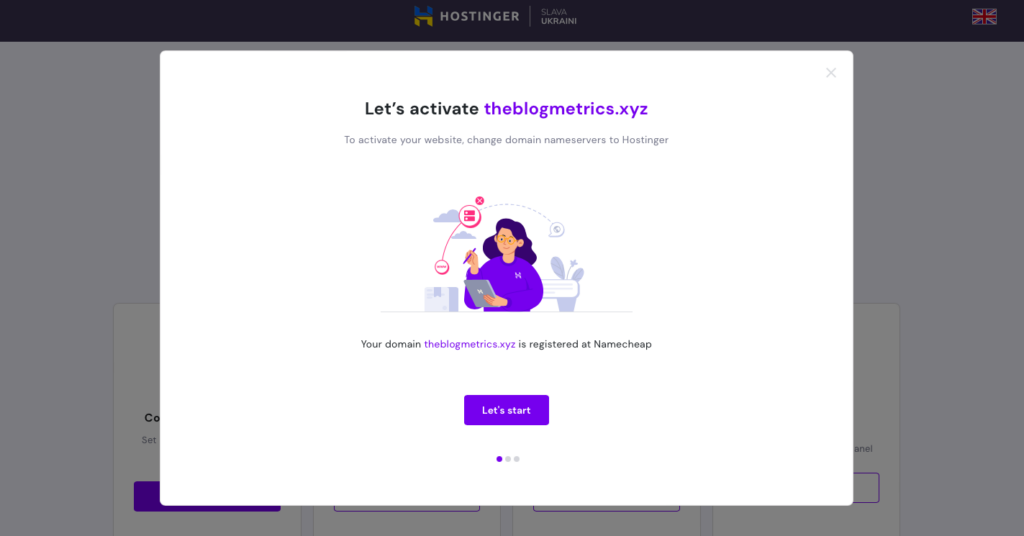
15. Now, you need to change nameservers in the domain registrar (NameCheap in our case). Just copy the Nameservers given by Hostinger.
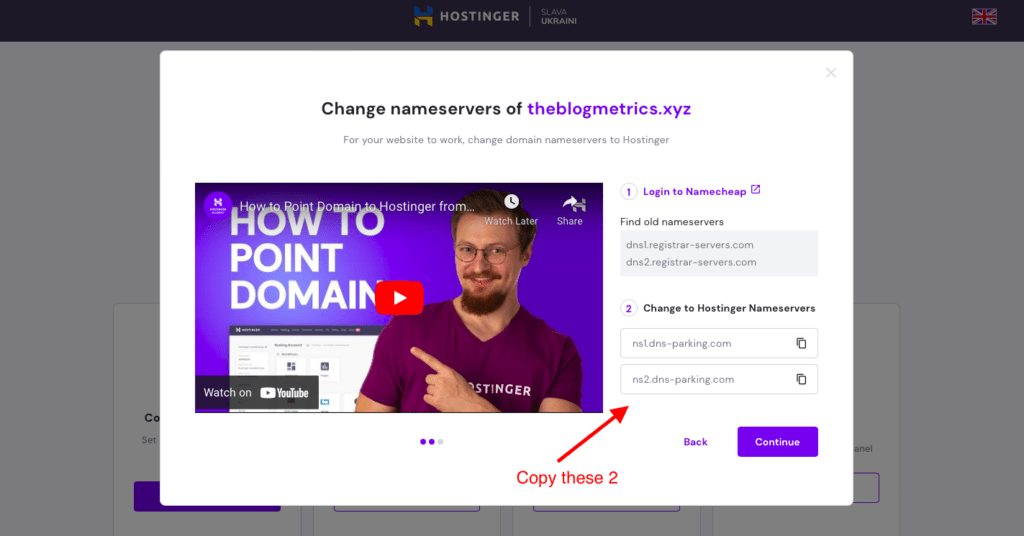
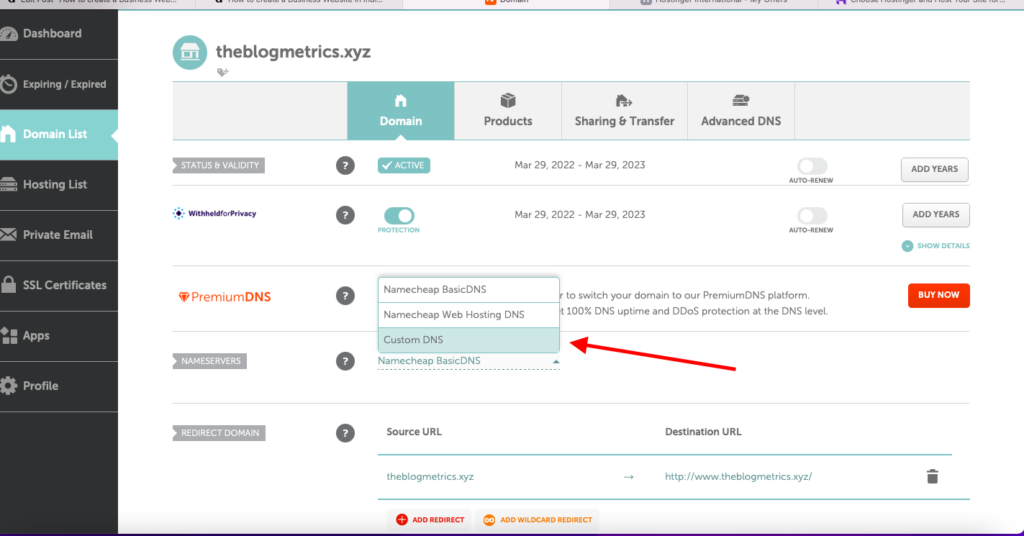
15. Next, head over to NameCheap and paste in the Custom DNS section.
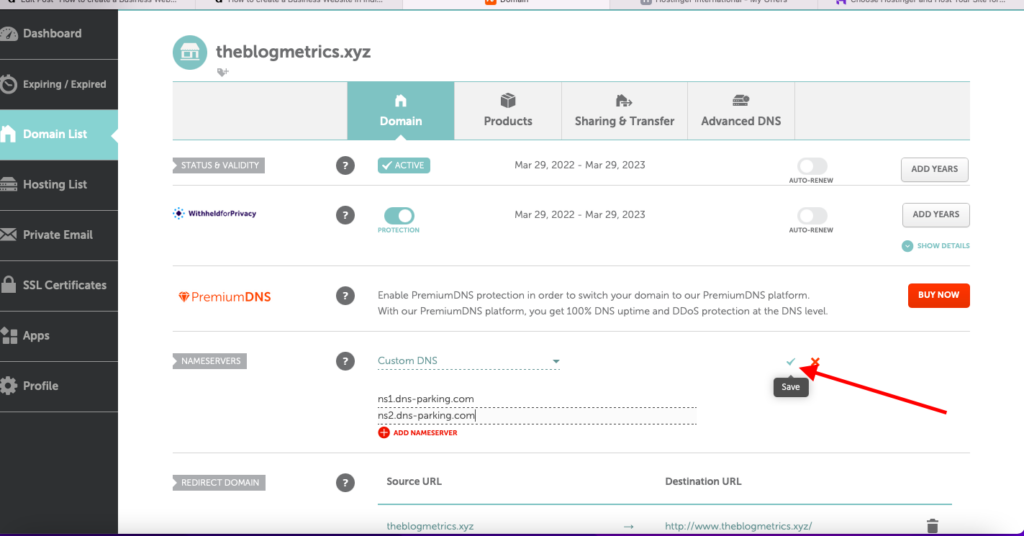
16. After pasting, click the Save icon.
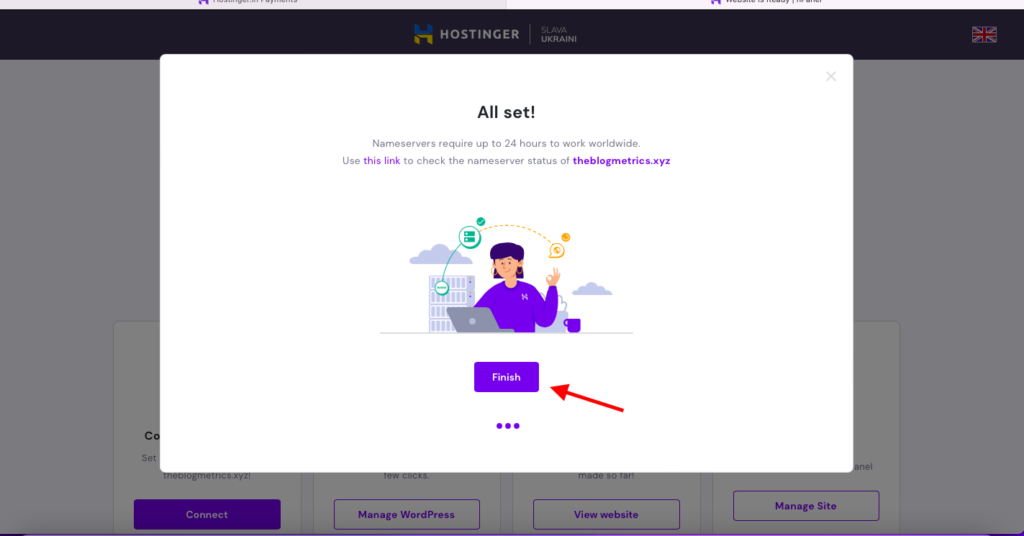
17. Come back to Hostinger and press Continue. You will see this message: your first website is almost ready, but it can take a few hours to 24 hours.
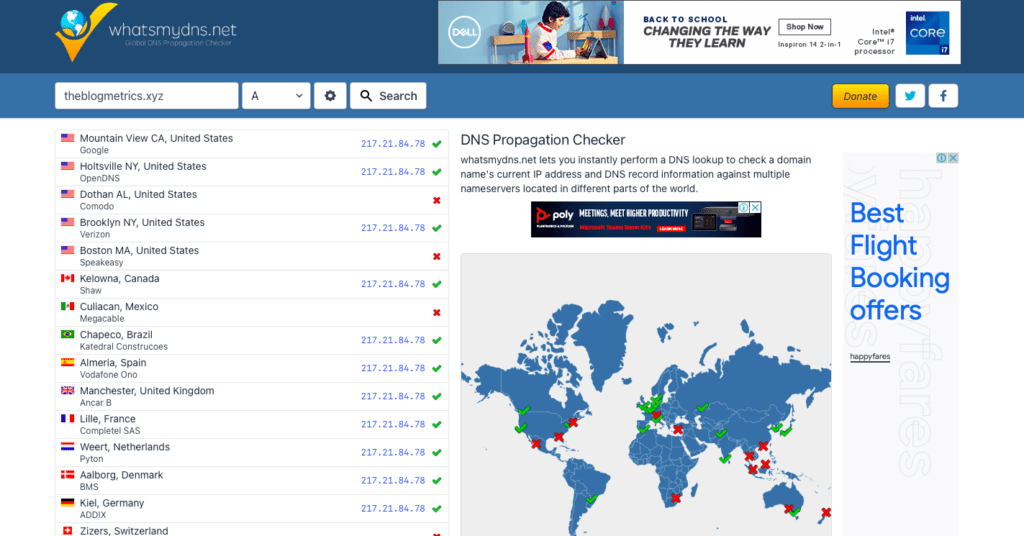
18. Adding SSL: There is one main step that is pending, which is adding SSL. I suggest you wait for some 20-30 minutes before adding SSL. You can use tools like WhatsMyDns.net to check whether your website is ready or not. In the screenshot below, you can see that my website is not online in some countries yet.
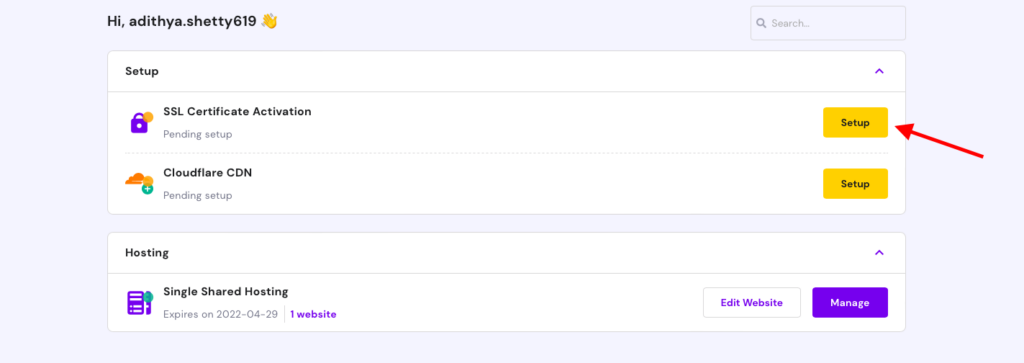
19. Let’s add SSL: Go to the Hostinger dashboard and click Setup.
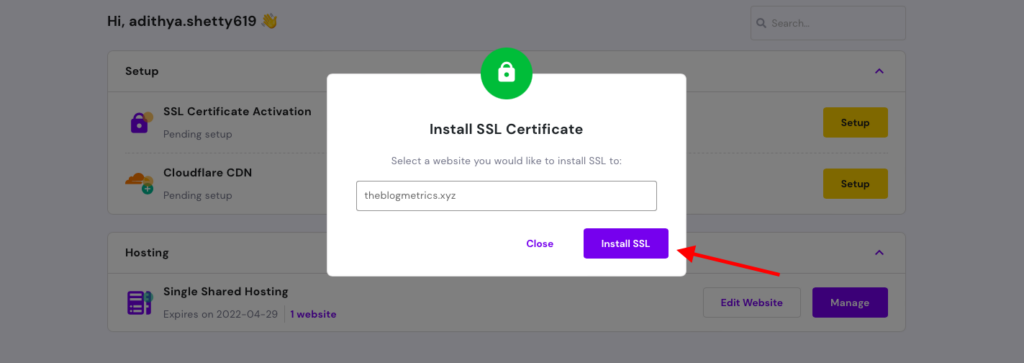
20. Click Install SSL
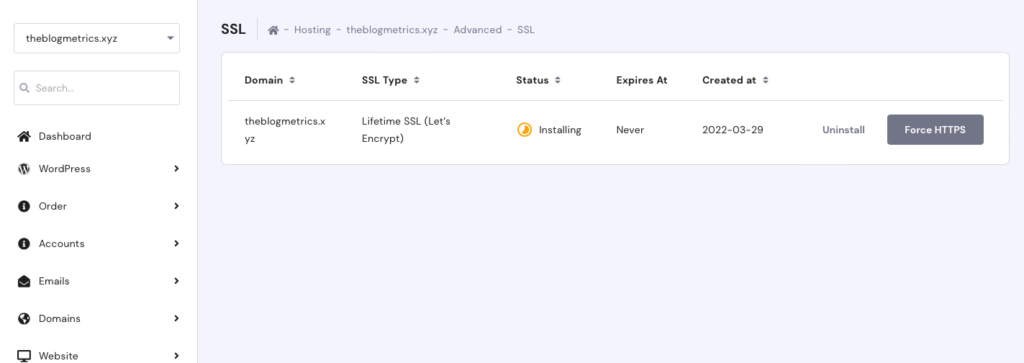
21. You can see that the system is installing the SSL.
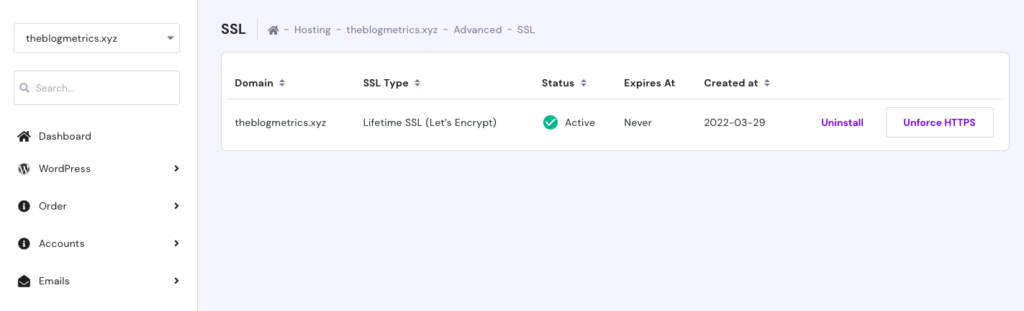
22. After a while, you can see the Active status of SSL.
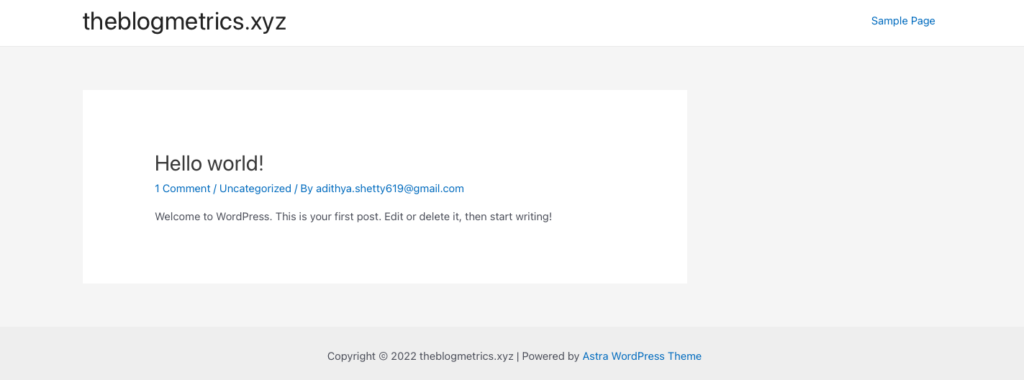
That’s It! Your First website is now Live:
How to Design Your Website
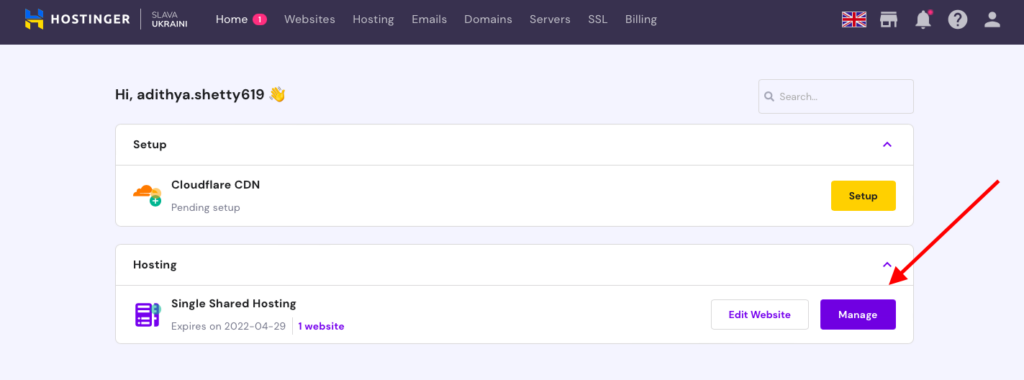
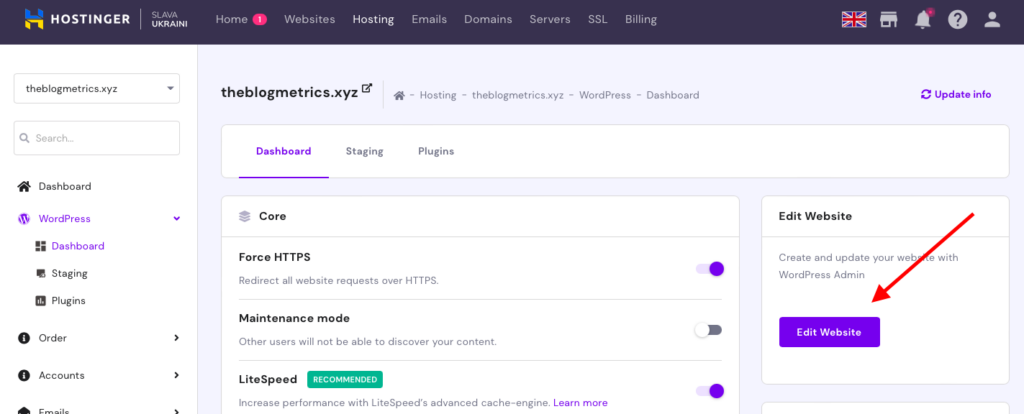
Now let’s design our new website. Log in to your Hostinger Dashboard, click on Manage.
Then click on Dashboard.
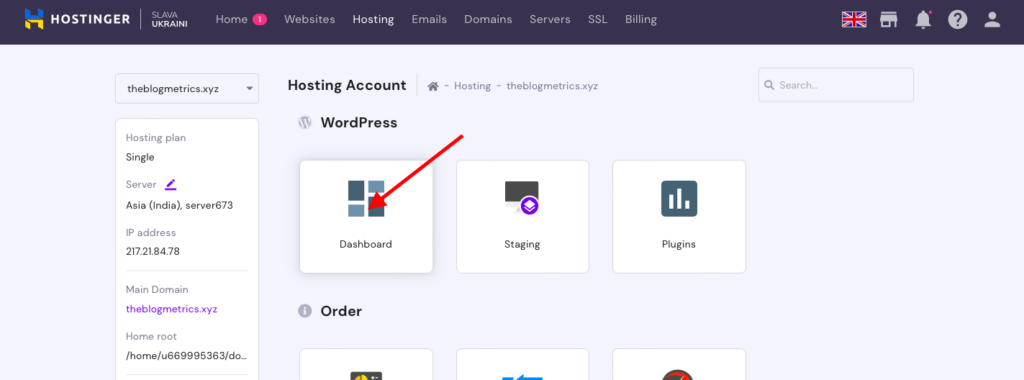
Then click Edit Website, and you will be redirected to the WordPress dashboard.
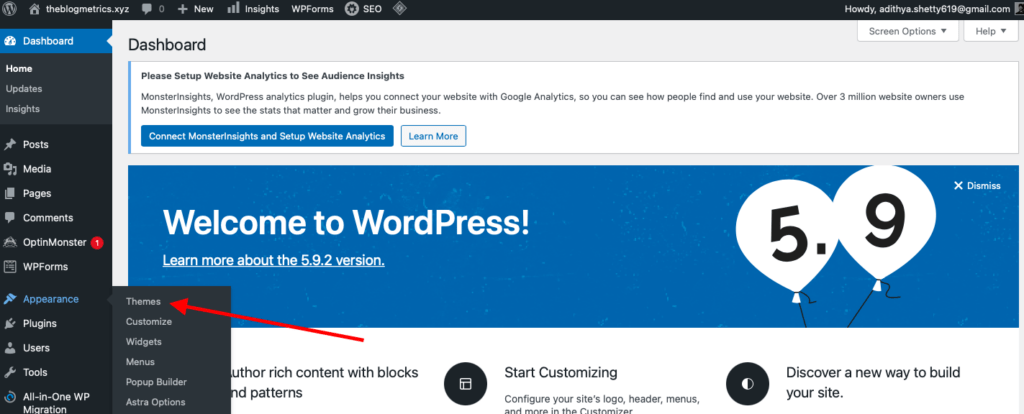
Now, click on Appearance>Themes.
Here you can customize the existing theme or add a new theme; you can browse millions of free themes from here.
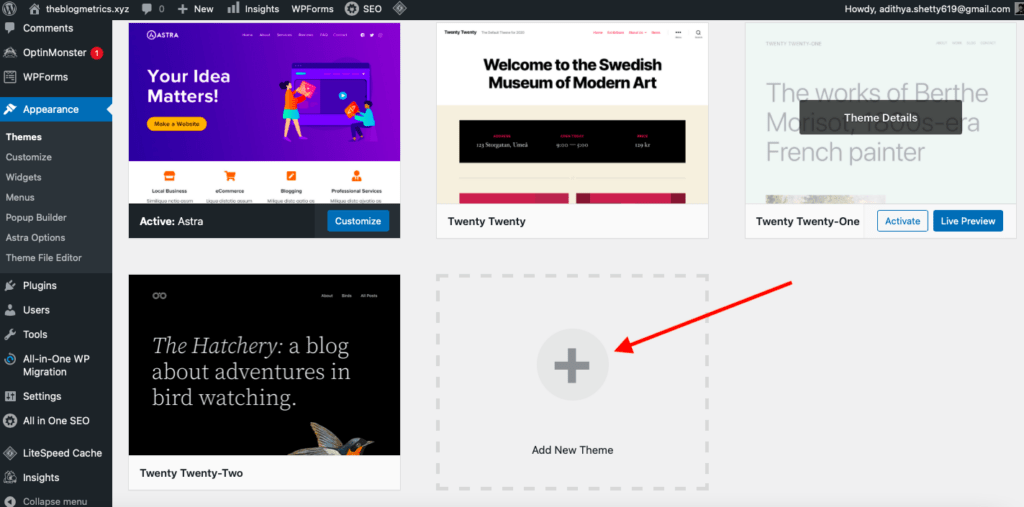
In the screenshot below, as you can see, I’ve changed the look of the entire website by just changing the theme.
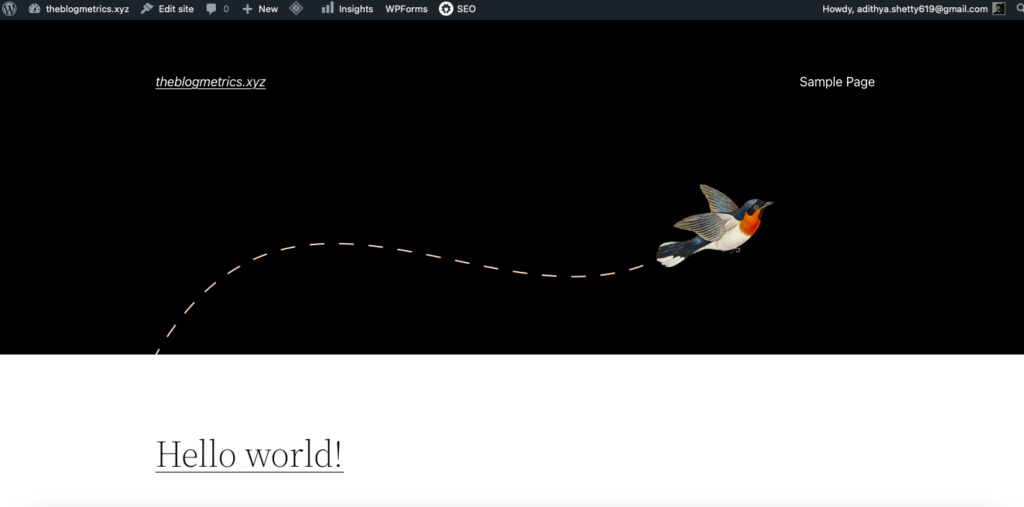
That’s it! Now you can play with your design and customize it as you like; you can also add features like eCommerce, a payment gateway, a gallery, etc. If you have a budget, you can purchase a premium theme as well; I use a premium theme called GeneratePress on this website.
I hope you found this tutorial helpful and that you’re able to build your first website.
Struggling to set up your website? I’m here to help; contact me here to get started with your project.